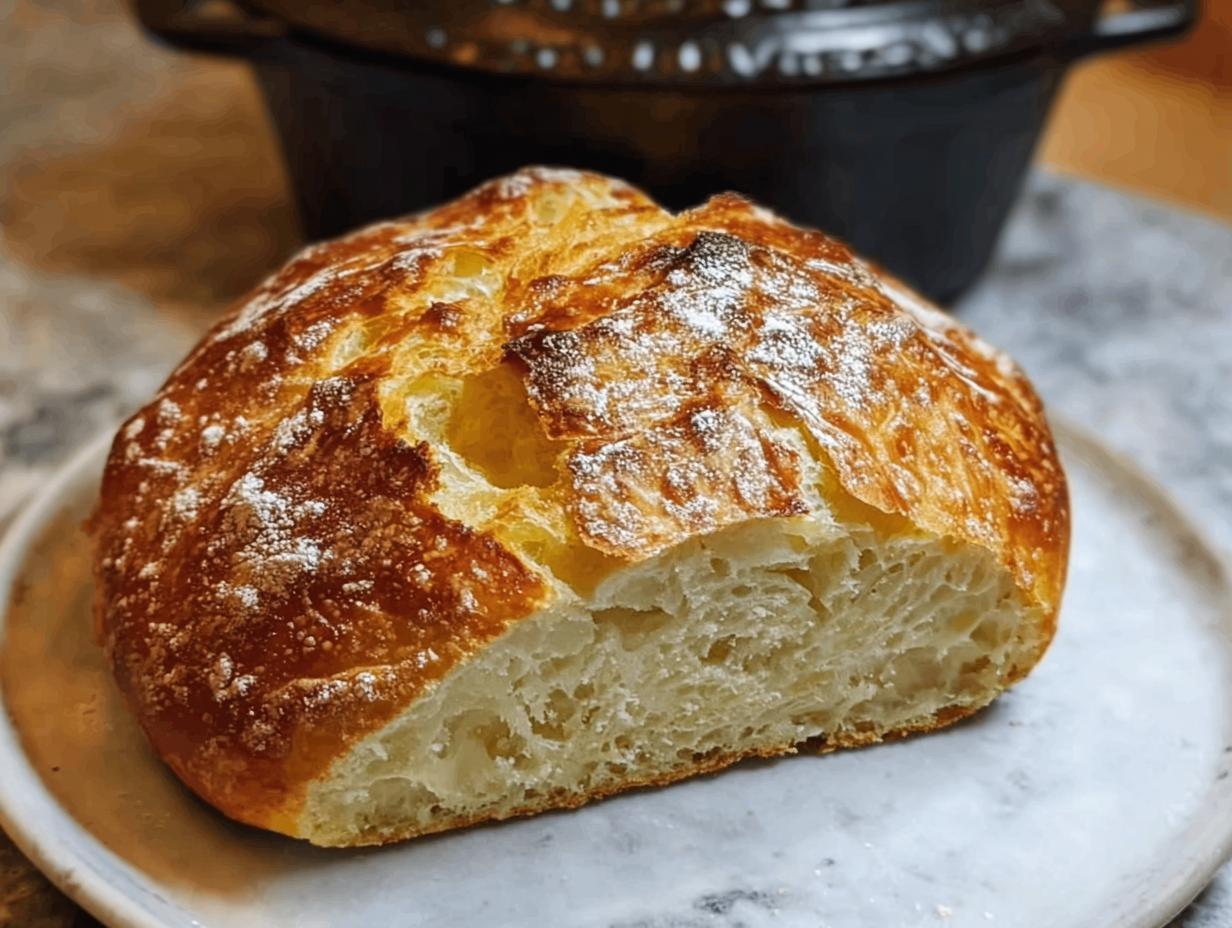
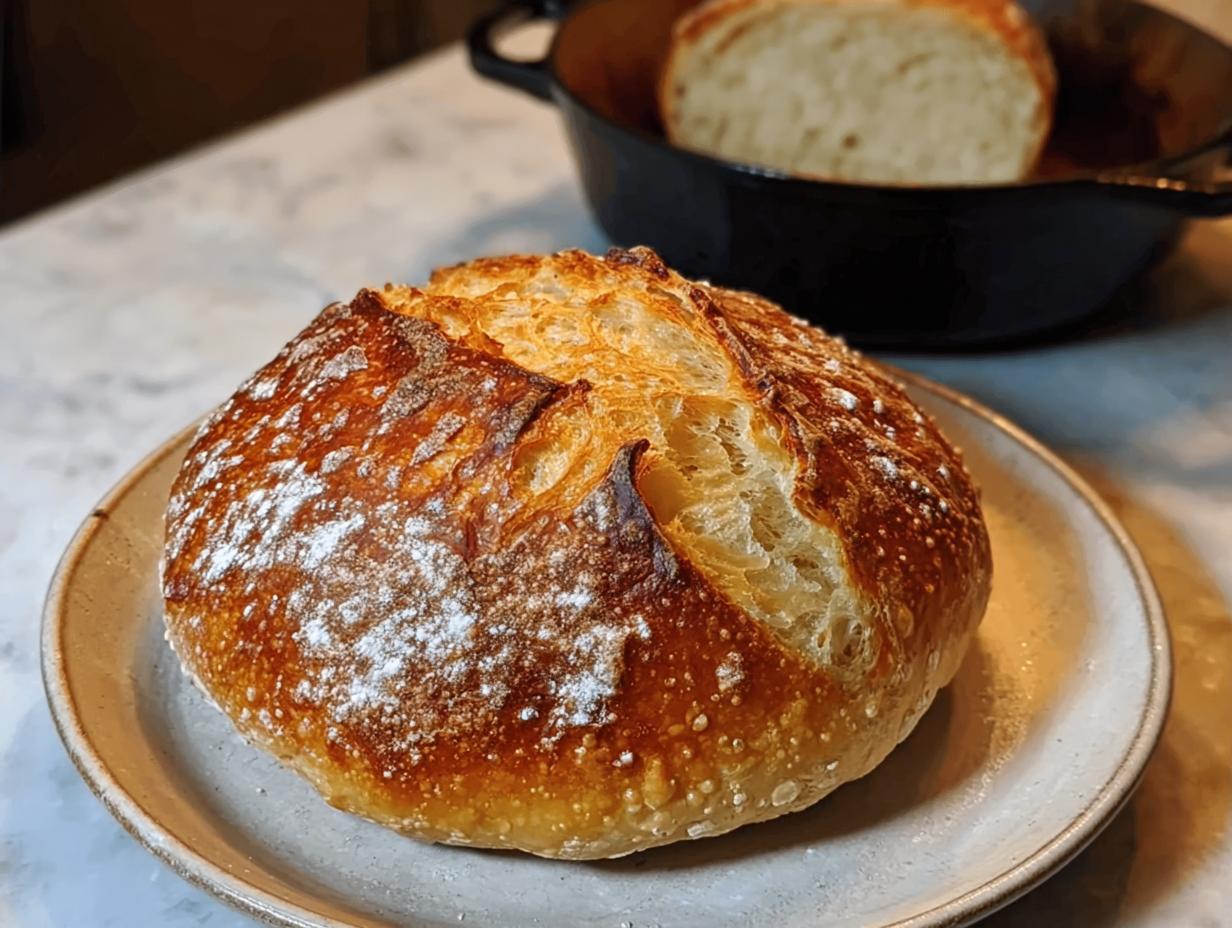
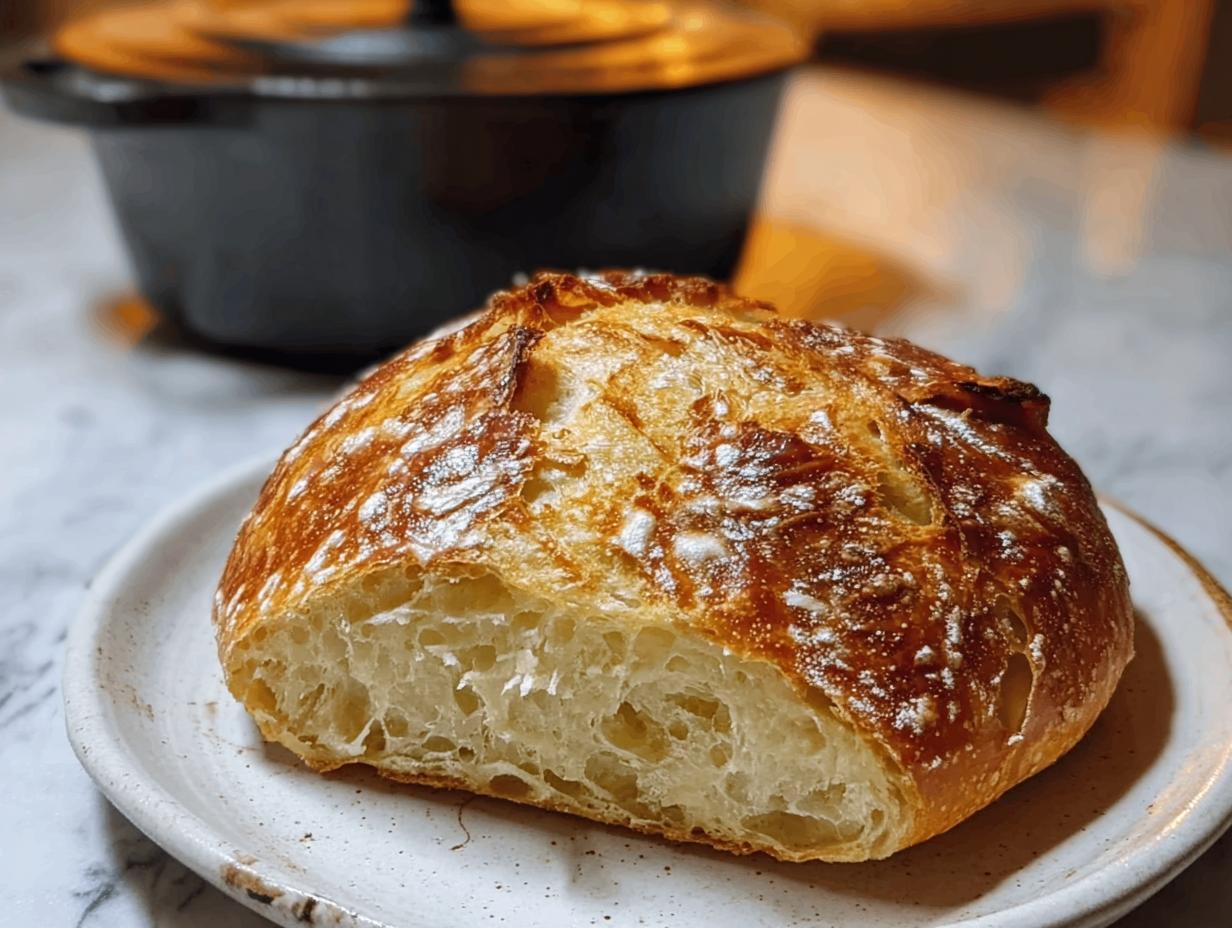
Stovetop bread oven needed? Not anymore! I discovered the magic of baking a perfect, crusty loaf without ever turning on my oven, and it’s honestly a game-changer for weeknights. I remember craving fresh bread but dreading the oven preheat time and heat. This method uses just a heavy pot on the stove, giving you that comforting aroma and delicious result. It’s truly a fantastic way to achieve a wonderful bread without oven stovetop. Let’s get this easy bread baking!
Why You’ll Love This Stovetop Bread Oven Needed
If you’re looking for a simple way to enjoy homemade bread without the fuss of an oven, this recipe is for you! It’s the perfect solution for anyone who doesn’t have an oven or wants to save energy.
- No oven required – truly a no oven bread recipe
- Achieve a beautiful golden crust and tender crumb
- Quick and easy preparation, perfect for busy weeknights
- Minimal cleanup thanks to stovetop cooking
- Incredible aroma fills your kitchen as it bakes
- A fantastic alternative to traditional baking methods
- Satisfy your craving for fresh bread anytime
- This no oven stovetop bread recipe is surprisingly foolproof
Ingredients for Stovetop Bread Oven Needed
You won’t believe how simple this is! All you need are a few pantry staples to create a delicious loaf using stovetop baking methods for bread. This recipe is so forgiving, making it a joy to prepare.
- 3 cups all‑purpose flour – this provides the structure for our loaf
- 1 tbsp sugar – helps activate the yeast and adds a touch of sweetness
- 1 tsp salt – crucial for flavor and dough development
- 2 ¼ tsp active dry yeast – our leavening agent, make sure it’s fresh!
- 1 cup warm water – around 105-115°F (40-46°C), essential for waking up the yeast
- 2 tbsp melted butter or oil – for richness in the dough and brushing the top
How to Make Stovetop Bread Oven Needed
Let’s get this bread made! Forget the oven and get ready for some simple stovetop magic. This method is perfect for anyone wanting to learn how to bake bread on stovetop.
- Step 1: First, let’s get our yeast going. In a small bowl, combine the 1 cup warm water with the 1 tbsp sugar. Sprinkle the 2 ¼ tsp active dry yeast over the top. Let it sit for about 5-10 minutes until it gets nice and foamy. This tells you the yeast is alive and ready to work its magic.
- Step 2: While the yeast is blooming, grab a large bowl. Whisk together the 3 cups all‑purpose flour and 1 tsp salt. Make a little well in the center of the dry ingredients. Pour your foamy yeast mixture into the well. Start stirring everything together with a spoon or spatula until a soft, slightly sticky dough forms. If it seems too dry, add a tiny splash more water; if it’s too wet, a bit more flour will do the trick.
- Step 3: Turn the dough out onto a lightly floured surface. Now for the kneading! Work the dough for about 5-7 minutes until it’s smooth, elastic, and feels wonderful under your hands. It should spring back slightly when you gently poke it.
- Step 4: Lightly grease a clean bowl with a little oil or butter. Place the kneaded dough inside, turning it to coat. Cover the bowl with a clean kitchen towel and set it in a warm, draft-free spot. Let it rise until it’s doubled in size, which usually takes about an hour. This is where the dough gets its lovely airy texture.
- Step 5: Once the dough has doubled, gently punch it down to release the air. Shape it into a round loaf. Get a heavy-bottomed pot or a thick skillet with a tight-fitting lid ready. Grease it well and place your shaped loaf inside. This pot is your new stovetop bread oven!
- Step 6: Place the covered pot over very low heat. This is crucial for successful stovetop baking methods for bread. Cook for 25-30 minutes. Resist the urge to peek too often, but check occasionally to make sure the bottom isn’t burning. You’re looking for a nice golden-brown color.
- Step 7: After the first 25-30 minutes, carefully remove the lid. If the bottom is golden and the loaf sounds hollow when you tap it, it’s time to flip or rotate it. Cook for another 15-20 minutes, covered, until the bread is fully cooked through.
- Step 8: Remove the bread from the pot and immediately brush the top with the 2 tbsp melted butter or oil. Let it cool on a wire rack for at least 15 minutes before slicing. The aroma will be incredible! Learning how to bake bread on stovetop is so rewarding.

Pro Tips for the Best Stovetop Bread Oven Needed
You’ve got the basics down, but here are a few tricks to elevate your stovetop bread game. These tips will help ensure you can consistently achieve that perfect loaf, even without a traditional oven.
- Use a heavy-bottomed pot or Dutch oven. This is key for even heat distribution, preventing scorching and ensuring a beautiful crust. It’s the closest you’ll get to a stovetop bread oven experience.
- Control your heat religiously. Low and slow is the mantra here. If you see smoke or smell burning, your heat is too high.
- Let the dough rise in a slightly warm place. A sunny windowsill or near a pilot light works wonders.
- Don’t overcrowd the pot when shaping the dough; give it room to expand.
What’s the secret to perfect stovetop bread?
The secret lies in the pot and the heat. Using a heavy, lidded pot that distributes heat evenly is crucial. The best pot for baking bread on stove will have thick walls and a snug-fitting lid to trap steam and heat, mimicking an oven environment.
Can I make this bread ahead of time?
You can prepare the dough up to the point of the second rise and refrigerate it overnight. Just let it come to room temperature for about 30 minutes before shaping and cooking. This makes it a great option for making ahead.
How do I avoid common mistakes with stovetop bread?
The biggest mistake is using heat that’s too high, which burns the bottom before the inside cooks. Also, don’t open the lid too often during the initial cooking phase, as this releases the steam needed for a good crust. For more on yeast activation, you can check out this guide to yeast.
Best Ways to Serve Stovetop Bread Oven Needed
This rustic loaf is incredibly versatile, perfect for so many meals. It’s a fantastic companion to hearty soups and stews, soaking up all that delicious broth. Imagine dipping a warm slice into your favorite lentil soup or chili – pure comfort! This easy stovetop bread recipe also makes for a wonderful base for open-faced sandwiches. Try toasting a slice and topping it with mashed avocado and a sprinkle of red pepper flakes, or layer it with smoked salmon and cream cheese. It’s a simple bread that truly shines.
Nutrition Facts for Stovetop Bread Oven Needed
When you master how to bake bread on stovetop, you get a wonderfully satisfying loaf. Here’s a breakdown of what you can expect per serving of this delicious bread.
- Calories: 180 kcal
- Fat: 4g
- Saturated Fat: 1g
- Protein: 5g
- Carbohydrates: 32g
- Fiber: 1g
- Sugar: 2g
- Sodium: 300mg
Nutritional values are estimates and may vary based on specific ingredients used.

How to Store and Reheat Stovetop Bread Oven Needed
Once your beautiful loaf is baked using these alternative bread baking methods, proper storage is key to keeping it fresh. Let the bread cool completely on a wire rack before you do anything else. Trying to store it warm will make it gummy. Once cool, you can store it at room temperature in a bread box or a loosely tied plastic bag for about 3-4 days. For longer storage, slicing the bread first makes life so much easier! Wrap individual slices tightly in plastic wrap, then in foil, and pop them into the freezer. They’ll stay delicious for up to 3 months. When you’re ready to enjoy a slice, you can toast it directly from frozen, or gently reheat it in a dry skillet over low heat for that lovely fresh-baked texture.
Frequently Asked Questions About Stovetop Bread Oven Needed
What is a stovetop bread oven?
A “stovetop bread oven” isn’t a specific appliance, but rather a technique or a setup that allows you to bake bread on your stovetop. It typically involves using a heavy, lidded pot that traps heat and steam, mimicking an oven environment. Many people use Dutch ovens or cast-iron pots for this purpose when they need a stovetop bread oven solution.
Can I use a regular pot for this recipe?
While a heavy-bottomed pot or Dutch oven is recommended for the best results, you can try a thick-bottomed skillet with a tight-fitting lid. The key is to ensure even heat distribution to prevent the bottom from burning. This method is a great example of how to make bread without an oven, but the right cookware helps significantly.
Why is my stovetop bread dense?
A dense loaf often results from a few common issues. Make sure your yeast is active by checking the foamy bloom. Don’t add too much flour when kneading, as a slightly sticky dough is usually ideal. Also, ensure you’re letting the dough rise properly in a warm place until doubled in size. Proper kneading and rising are crucial for a light texture in any bread without oven stovetop recipe.
How do I get a crusty exterior without an oven?
The tight-fitting lid on your pot is your best friend for achieving a crusty exterior. It traps steam released from the dough, which is essential for developing that desirable crust. Cooking at a consistent, low temperature also helps. This is one of the benefits of learning how to bake bread on stovetop – you gain control over the crust development.
Variations of Stovetop Bread Oven Needed You Can Try
Once you’ve mastered the basic stovetop bread oven needed recipe, you’ll find it’s a fantastic canvas for creativity. Experimenting with different flavors and even dietary adjustments is part of the fun when cooking bread on stove.
- Garlic Herb Loaf: Before the second rise, knead in 2 tablespoons of minced fresh garlic and 1 tablespoon of chopped fresh rosemary or your favorite dried herbs. The aroma while it bakes is incredible!
- Whole Wheat Blend: Substitute half of the all-purpose flour with whole wheat flour for a nuttier flavor and a denser, more rustic texture. You might need a touch more water, so adjust as needed.
- Sweet Cinnamon Raisin: Gently fold in ½ cup of raisins and 1 teaspoon of cinnamon with the flour and salt before adding the wet ingredients. This turns your rustic loaf into a delightful breakfast or snack bread.
- Cheesy Jalapeño: Mix in ½ cup of shredded cheddar cheese and 1-2 tablespoons of finely chopped jalapeños (seeds removed for less heat) after the dough has formed. This savory variation is perfect toasted with butter.

Stovetop Bread Oven Needed: Amazing 1 Loaf
- Total Time: 1 hour 45 minutes
- Yield: 1 loaf (about 8–10 slices) 1x
- Diet: Vegetarian
Description
A soft, delicious bread made entirely on the stovetop—no oven required. This yeasted loaf is cooked gently in a pot over low heat, delivering a warm, golden crust and a tender, satisfying crumb. It’s a simple, rustic recipe that brings all the comforts of homemade bread without needing to heat up the oven.
Ingredients
- 3 cups all‑purpose flour
- 1 tbsp sugar
- 1 tsp salt
- 2 ¼ tsp active dry yeast
- 1 cup warm water
- 2 tbsp melted butter or oil
Instructions
- Dissolve sugar in warm water, sprinkle yeast on top, and let sit for 5–10 minutes until foamy.
- Combine flour and salt in a large bowl. Make a well in the center and pour in the yeast mixture. Stir until a soft, slightly sticky dough forms. Adjust with a splash of water if too dry or flour if too wet.
- Turn dough onto a floured surface and knead for 5–7 minutes until smooth and elastic.
- Place dough in a greased bowl, cover with a clean towel, and let rise in a warm place until doubled in size (about 1 hour).
- Punch down the dough, shape it into a round loaf, and place it in a greased heavy pot or thick-bottomed skillet with a tight-fitting lid.
- Cook over very low heat for 25–30 minutes, checking occasionally to prevent burning.
- Once the bottom is browned and the loaf sounds hollow when tapped, carefully flip or rotate it. Cook for another 15–20 minutes until cooked through.
- Brush the top with melted butter or oil and let it cool on a rack before slicing.
Notes
- For longer storage, freeze sliced bread and toast directly from frozen.
- Reheat slices in a dry pan or toaster for a fresh-baked feel.
- Add minced garlic, dried herbs, or seeds for variations.
- Mix in raisins and cinnamon for a sweeter version.
- Substitute part or all of the all-purpose flour with whole wheat flour for a denser loaf.
- Prep Time: 15 minutes
- Cook Time: 45 minutes
- Category: Bread
- Method: Stovetop Baking
- Cuisine: American
Nutrition
- Serving Size: 1 slice (approx. 1/10 loaf)
- Calories: N/A
- Sugar: N/A
- Sodium: N/A
- Fat: N/A
- Saturated Fat: N/A
- Unsaturated Fat: N/A
- Trans Fat: N/A
- Carbohydrates: N/A
- Fiber: N/A
- Protein: N/A
- Cholesterol: N/A
Keywords: stovetop bread oven needed, no oven bread recipe, bread without oven stovetop, how to bake bread on stovetop, best stovetop bread maker, stovetop baking methods for bread, cooking bread on stove, oven-free bread recipes, can you bake bread on a stovetop, alternative bread baking methods, stovetop bread pan, bread baking pot for stovetop, best pot for baking bread on stove, what is a stovetop bread oven, stovetop bread baking equipment, indoor bread baking without an oven, portable bread oven for stovetop, stovetop bread maker appliance, how to make bread without an oven, need to bake bread no oven, what to use to bake bread without an oven, easy stovetop bread recipe, quick bread recipe stovetop, best way to bake bread indoors without oven
